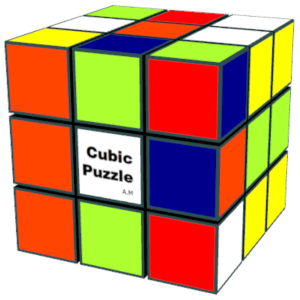
描述
-When rotating the cube surface, click the blocks. -You can rotate the mouse by clicking (or touching if the touch is valid) outside or the center of the whole cube. (*1) -The size can be changed by grabbing the border of the window with the mouse. (*1)
-Press the "☆" button to move the surface appropriately. -Press the "△" buttons to display one operation up to completion. -Press the "◇" buttons to display the steps for aligning the entire surface. -Press the "□" buttons to switch the background between transparent and non-transparent. (*2) -Press the "○" buttons to You can set the color for each block. (*3,*4) -Press the "★" button to display the setting dialog.
The following functions are assigned to the keyboard.
A : automatic alignment. X : mixing. N : step. P : Redo. V : show / hide the buttons. C : Setting dialog is displayed. (*5)
G : Register the current background image. (*6,*21) K : Delete the current background image. M : Update the current background image. (*7)
O : Restore the previous record. (*8) S : Record the current status. (*8,*9)
F : The front rotates 90 degrees. (*10,*11) B : The back rotates 90 degrees. (*10,*11) L : The left rotates 90 degrees. (*10,*11) R : The right rotates 90 degrees. (*10,*11) U : The up rotates 90 degrees. (*10,*11) D : The down rotates 90 degrees. (*10,*11)
←,→: Rotate. (*12) ↑, ↓: Rotate. (*12) Home : Rotate to the right position. End : Rotate 180 degrees.
0 : Reset the surface pattern. +, -: Pattern is switched. (*13) * : The surface pattern is switched at random. (*14) . : Switch to custom surface. (*15) @ : Test mode. Z : Return to the initial state. T : Temporary cancellation of transparent background. (*16) Y : Background color transparency level adjustment. (*16,*17)
E, Esc: Exit.
You can set the pattern from the clipboard in the block surface setting dialog. (*18) You can specify an external image file by pressing the "+" or "A" key when selecting a pattern. (*19,*20) To specify the color with the color picker, click the title on the left of the combo box. To initialize the image history, press the "OK" button and the Ctrl key in the setting dialog at the same time.
(*1) If the background is transparent in the frameless mode, you can temporarily cancel it with the'T'key. (*2) This is a workaround because the entire cube cannot be rotated when the background is transparent in the frameless mode. (*3) When the setting is completed, press the ○ button again. (*4) When scanning from the camera, press the Shift key at the same time..(requires installation of cube capture.) (*5) To initialize the image history, press the OK button and Ctrl key at the same time. (*6) The app disappears temporarily while saving the background. (*7) The app is temporarily minimized while the background is updated. (*8) The file can be specified by pressing the Ctrl key at the same time. (*9) If you select the text by file type, you can save the solving procedure. (*10) Pressing the Ctrl key simultaneously reverses the rotation direction. (*11) You can move the surface to the front by pressing Shift at the same time. (*12) The reference for rotation is in the cube. (*13) Other than the numeric keypad, the "+" key corresponds to the "^" key. (*14) Other than the numeric keypad, the "*" key corresponds to the "|" key. (*15) Effective when the image of the surface is changed in the settings. (*16) Limited to frameless mode. (*17) Press the Shift key at the same time to return, and press the Ctrl key at the same time to reset. (*18) It can be specified by pressing the Ctrl key and the "V" key at the same time. (*19) Specify a square (about 200x200) PNG file. The transparent color part is replaced with the set color. (*20) You can specify the transparent area by pressing the Ctrl key at the same time, but if the number of the same color is small, the transparent area will be narrowed. (*21) You can specify the image file by pressing the Ctrl or Shift keys at the same time. (Ctrl: Maintain image aspect ratio, Shift: Do not maintain)
See our privacy policy for details.


